mirror of https://github.com/open-mmlab/mmengine
76 lines
2.7 KiB
Markdown
76 lines
2.7 KiB
Markdown
# VS Code 调试程序
|
|
|
|
## 调试多卡程序
|
|
|
|
多进程(多卡)程序出现错误时,先判断是否和多进程相关,如不相关,建议使用单卡调试。
|
|
|
|
本文将基于 MMEngine 中的 [example](https://github.com/open-mmlab/mmengine/blob/main/examples/distributed_training.py) 脚本来介绍如何使用 VS Code 调试多卡程序。
|
|
|
|
### 安装 MMEngine
|
|
|
|
因为需要使用 MMEngine 中的 example 脚本,为了方便,可以源码安装 MMEngine。
|
|
|
|
```bash
|
|
# 如果克隆代码仓库的速度过慢,可以从 https://gitee.com/open-mmlab/mmengine.git 克隆
|
|
git clone https://github.com/open-mmlab/mmengine.git
|
|
cd mmengine
|
|
pip install -e . -v
|
|
```
|
|
|
|
### 运行多卡程序
|
|
|
|
```bash
|
|
torchrun --nproc_per_node=2 examples/distributed_training.py --launcher pytorch
|
|
```
|
|
|
|
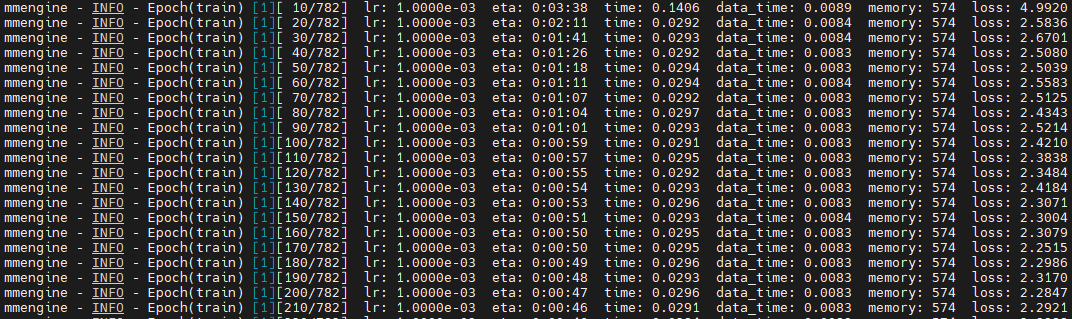
运行上面的命令,可以看到脚本正常运行并打印训练日志。
|
|
|
|
|
|
|
|
脚本正常运行后,可以停掉程序。
|
|
|
|
### 调试多卡程序
|
|
|
|
使用 VS Code 调试需先配置 `~/.vscode/launch.json`。
|
|
|
|
```json
|
|
{
|
|
"version": "0.2.0",
|
|
"configurations": [
|
|
{
|
|
"name": "Python: torchrun",
|
|
"type": "python",
|
|
"request": "launch",
|
|
// 设置 program 的路径为 torchrun 脚本对应的绝对路径
|
|
// 可使用 pip show torch 查看 torch 的安装路径
|
|
"program": "/home/username/miniconda3/envs/py39pt20cu117/lib/python3.9/site-packages/torch/distributed/run.py",
|
|
// 设置 torchrun 命令的参数
|
|
"args":[
|
|
"--nproc_per_node=2",
|
|
// examples/distributed_training.py 的绝对路径
|
|
"/home/username/codebases/mmengine/examples/distributed_training.py",
|
|
"--launcher=pytorch"
|
|
],
|
|
"console": "integratedTerminal",
|
|
"justMyCode": true
|
|
}
|
|
]
|
|
}
|
|
```
|
|
|
|
```{note}
|
|
如果你使用的启动命令是 `python -m torch.distributed.launch --nproc_per_node=2 examples/distributed_training.py --launcher pytorch`,则只需将上面配置的 program 的 `run.py` 替换为 `launcher.py` 即可。
|
|
```
|
|
|
|
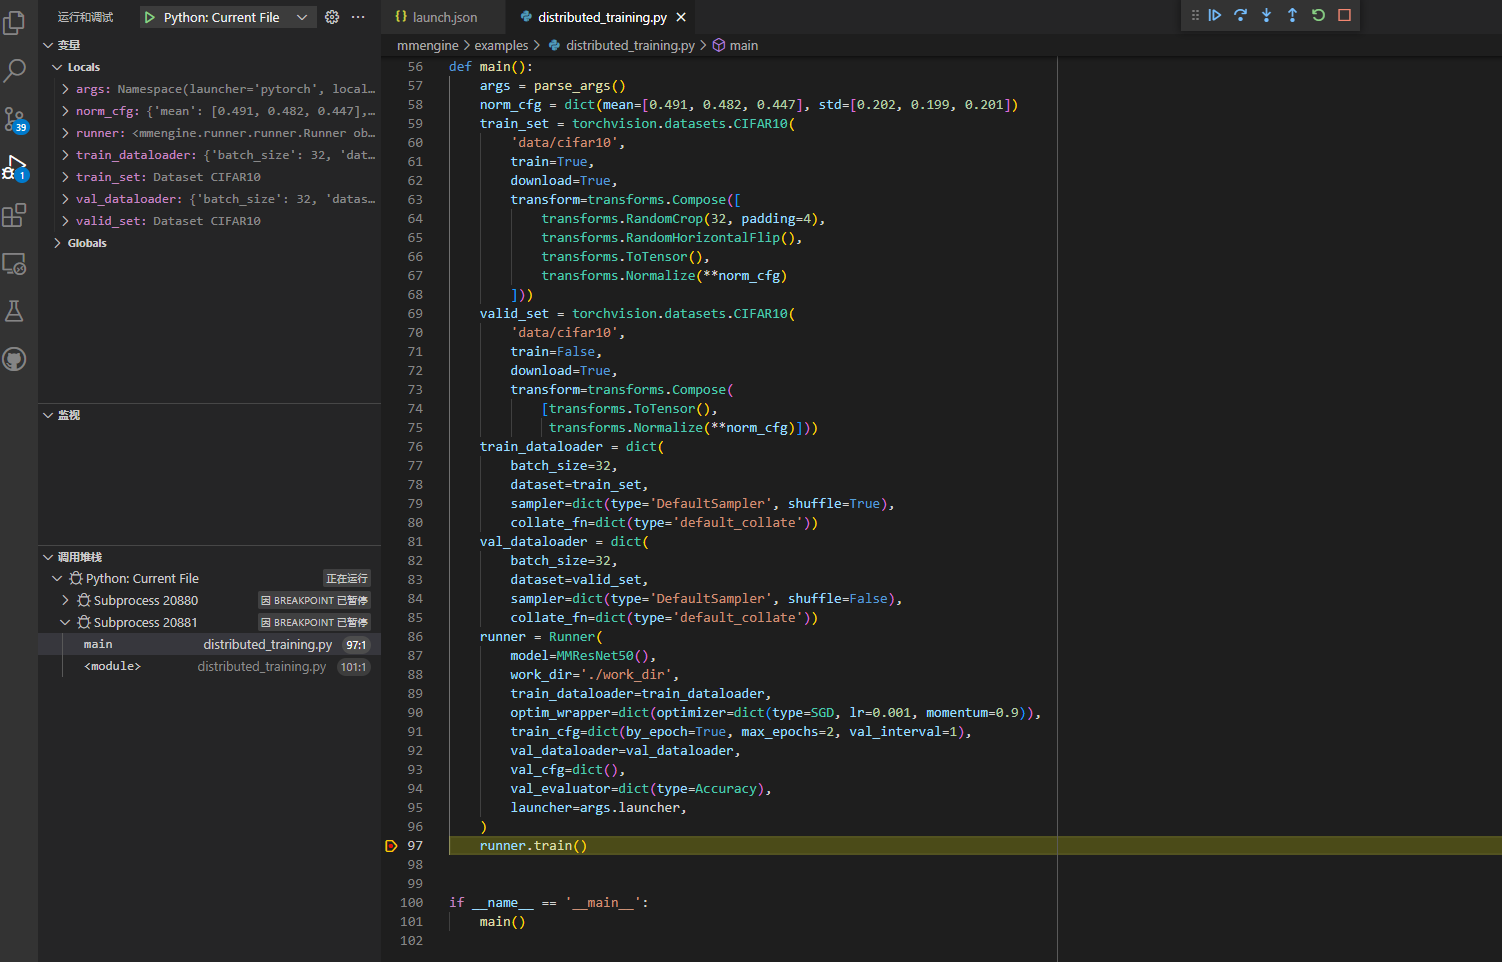
接下来在 VS Code 中设置断点,例如我们希望看一下 MMEngine Runner 的 train 过程,我们可以在 `runner.train()` 处设置断点。
|
|
|
|

|
|
|
|
最后点击 `Python: Current File` 按钮即可开始调试。
|
|
|
|
|
|
|
|
点击 F11 可跳入 `runner.train()` 查看它的实现。
|
|
|
|

|